
What we are going to cover is how to add tiling attributes for a texture shader. I figured out how to do this a few weeks ago when I was playing around in my engine (it's really not all that hard). I was trying to build interior walls like they use in the Unreal engine but I couldn't figure out a good way of building the subtraction space model they use in their editor... well needless to say, Unreal also has the ability to dynamically set texture location and scaling in its editor. I of course think this is very important when you want to line up textures and build walls that are longer than your texture is wide. So lets begin:
Here I have a basic texture shader:
  float4x4 WorldViewProject;
  sampler TextureSampler;

  struct VS_INPUT {
   float4 Position : POSITION0;
   float2 Texcoord : TEXCOORD0;
  };

  struct VS_OUTPUT {
   float4 Position : POSITION0;
   float2 Texcoord : TEXCOORD0;
  };

  VS_OUTPUT Transform(VS_INPUT Input) {
   VS_OUTPUT Output;

   Output.Position = mul(Input.Position, WorldViewProject);
   Output.Texcoord = Input.Texcoord;

   return Output;
  }

  struct PS_INPUT {
   float2 Texcoord : TEXCOORD0;
  };

  float4 Texture(PS_INPUT Input) : COLOR0 {
   return tex2D(TextureSampler, Input.Texcoord);
  };

  technique TransformTexture {
   pass P0 {
    VertexShader = compile vs_3_0 Transform();
    PixelShader  = compile ps_3_0 Texture();
   }
  }
The concept here is very simple, take in the world-view-projection matrix and the texture sampler, and map them to the vertex texture positions. Then in the pixel shader we simply sample our texture for the appropriate color value and output that color. I have purposefully neglected to add any lighting to this shader for simplicity sake.
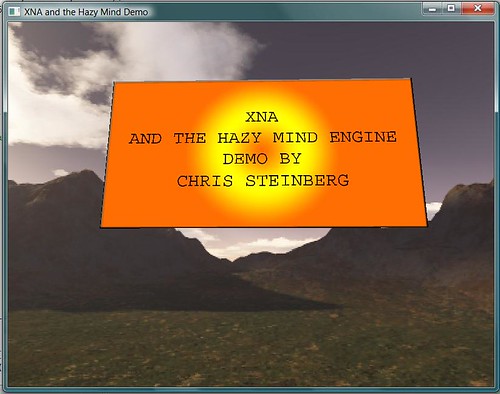
Here is a quad that I created that uses the simple version:
So now we want to provide the ability to offset the texture position and to be able to scale the texture for tiling purposes. We will add the following attributes to the top of the shader file so they are accessible from our code:
  float TextureScaleX;
  float TextureScaleY;
  float TextureOffsetX;
  float TextureOffsetY;
These values are going to be used in factors. This will make the math really simple, you will just have to remember how the math is done and everything will work out really easy when trying to set up your image. Now we will change our Texture function to perform the scaling and the texture offset. It looks like this:
  float4 Texture(PS_INPUT Input) : COLOR0 {

   float2 ScaledTexcoord = Input.Texcoord;
   ScaledTexcoord.x *= TextureScaleX;
   ScaledTexcoord.y *= TextureScaleY;
   ScaledTexcoord.x += TextureOffsetX;
   ScaledTexcoord.y += TextureOffsetY;
   return tex2D(TextureSampler, ScaledTexcoord);
  };
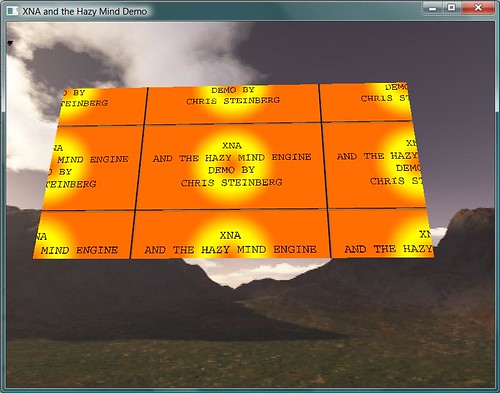
And there we have it. Our shader now can accept scaling and offset factors, for example all we would have to do to tile a quads texture to 2x2 tiles, would be to set the shaders x, y scale factors to 2 and we would have 4 copies of the texture displayed on the quad. Say we wanted to shift a texture over by 50% so the textures started tiling at the center of the image in the upper left corner, all we have to do is set the TextureOffset x, y to .5 and we get the result shown below.
2 comments:
Is there a link for the complete source?
Thanks for this little tidbit, was very helpful!
Post a Comment